Overview:
Author: Diyaa
Published date: August 3rd, 2024
Last updated: August 3rd, 2024
This document explains how to use the DDNS-Cloudflare-bash script to dynamically update DDNS with CloudFlare using API keys. I am using a bash script from this public Github repository DDNS-Cloudflare-Bash. This article is simply the documentation of how to use the script in the DDNS-Cloudflare-Bash repository.
I am using this script to update an FQDN DNS record automagically through crontab on multiple Linux virtual private servers in different cloud regions.
Warning
I am using a TTL of
120seconds on the FQDN record. You might see this TTL value as low. Feel free to change it when modifying the script variables.
Technical procedure:
Get an API token from Cloudflare:
Login to your Cloudflare account and navigate to the home page (websites tab):
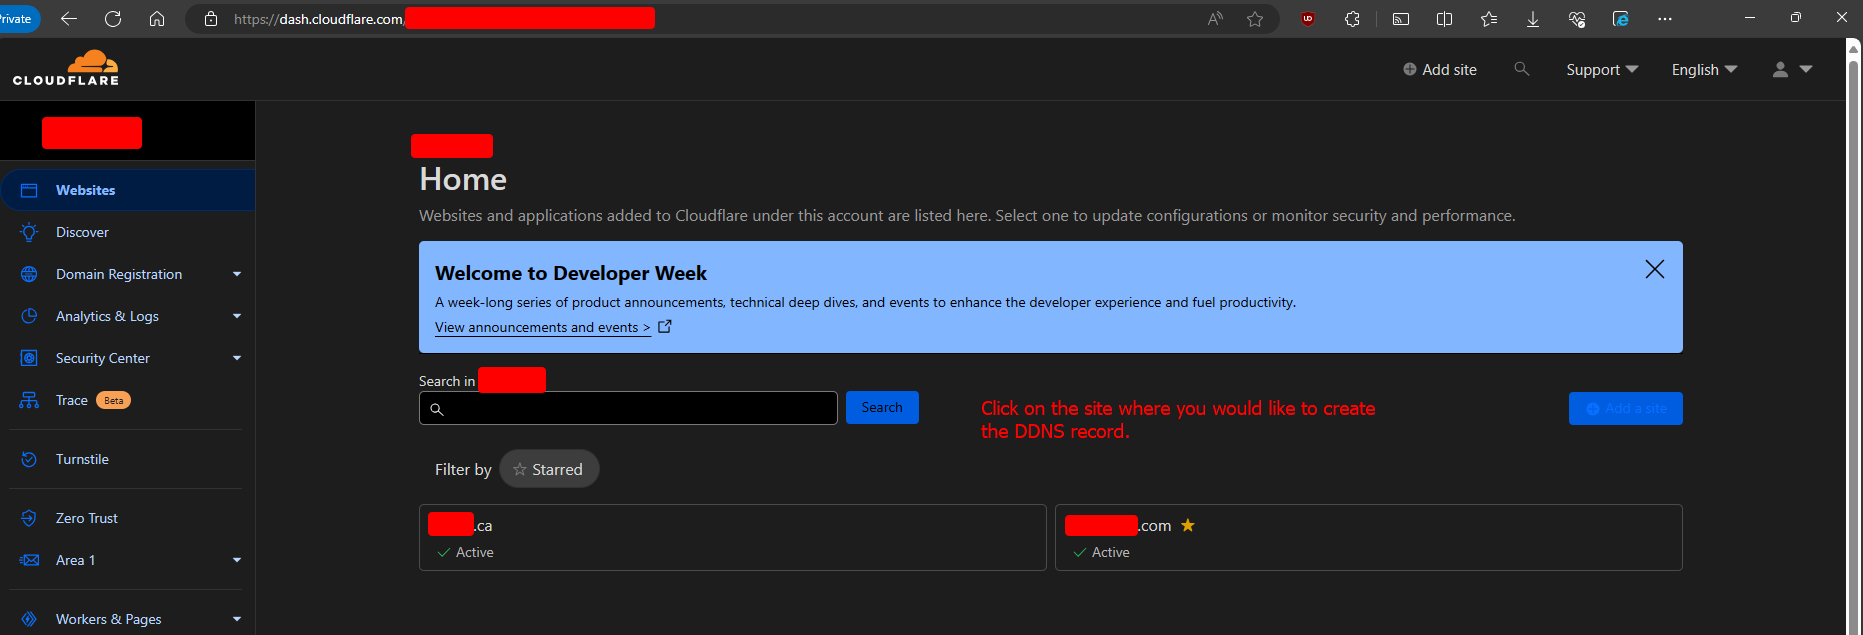
Navigate to the DNS zone records:
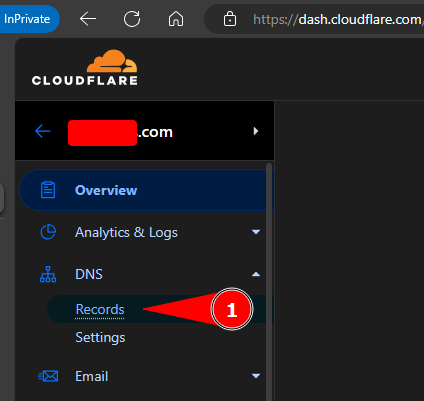
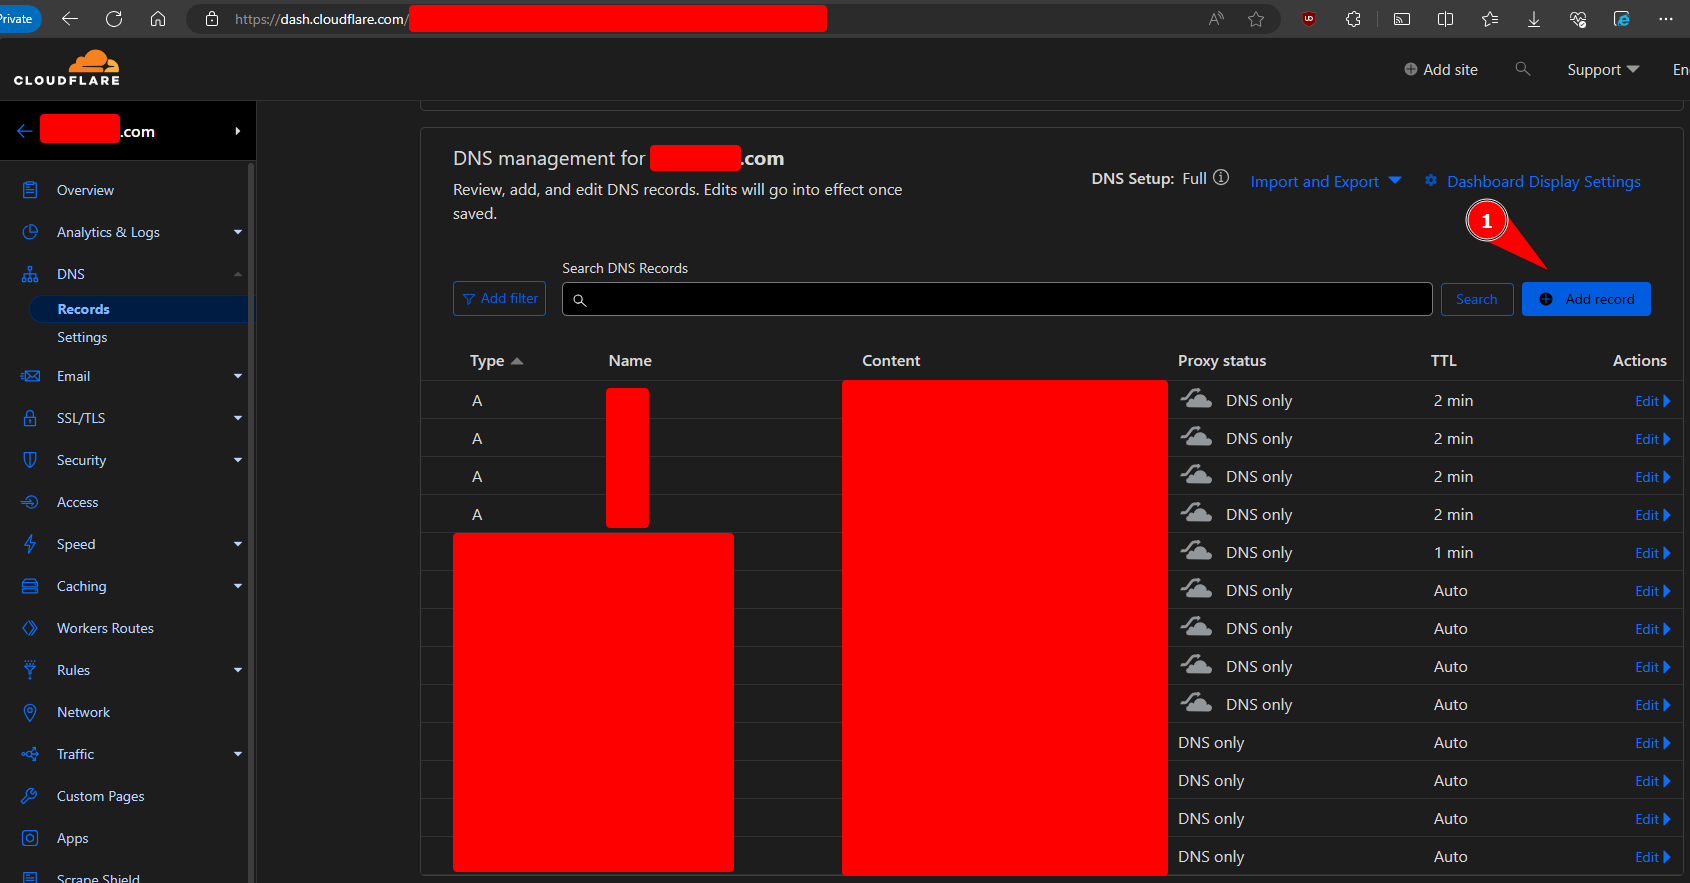
Create the record you wish to modify with DDNS (the record must exist before using it with the script):
Note
You can add an invalid IP or a documentation IP in the type A record to start with. Example: 198.51.100.1 (documentation range IP). Tip: Do not try to resolve the record before it updates.
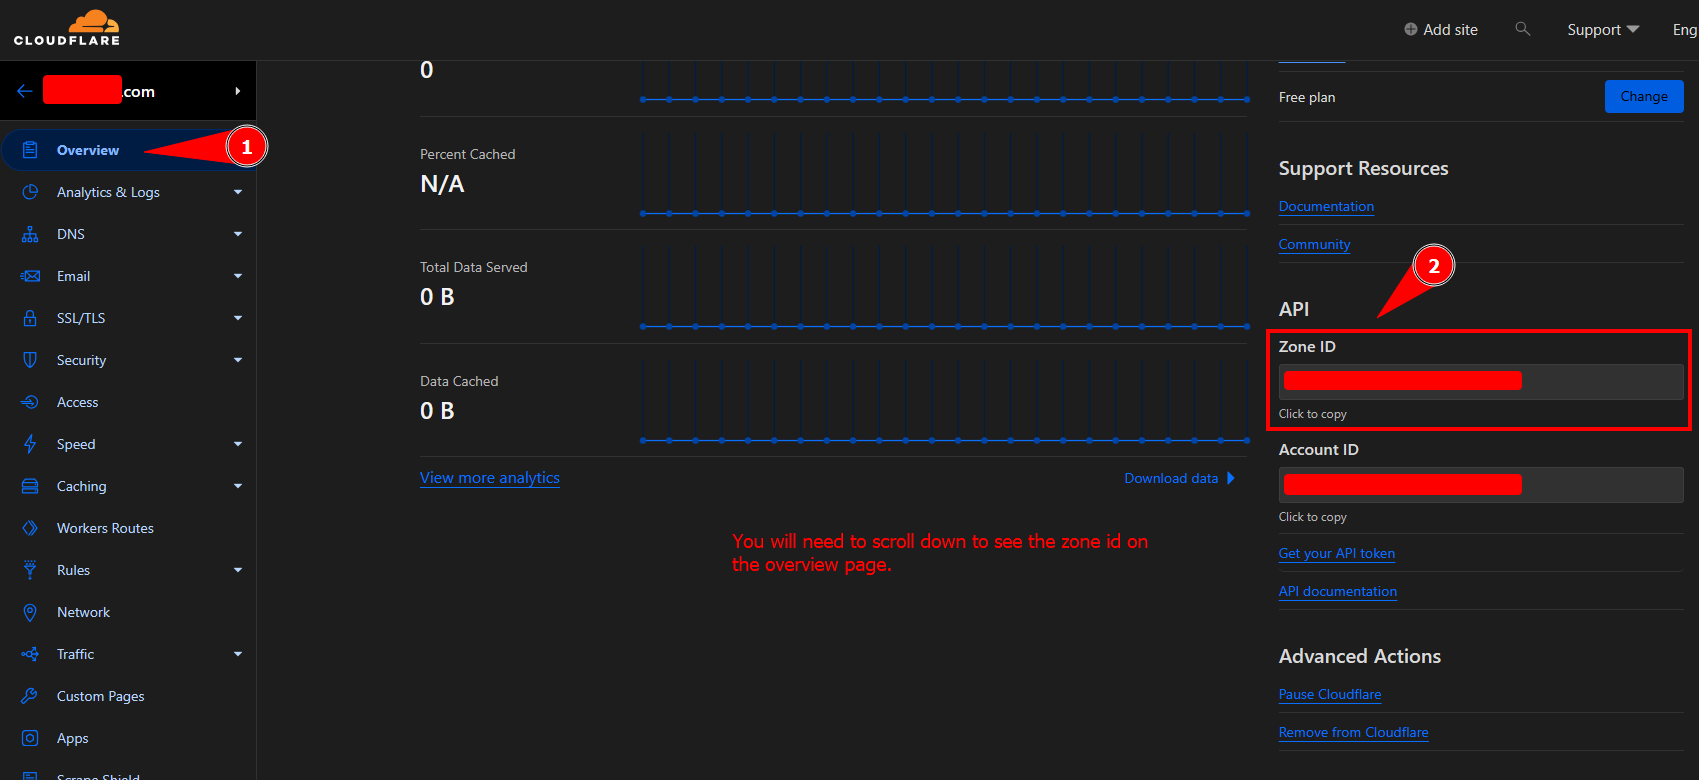
Get the zone id from cloudflare:
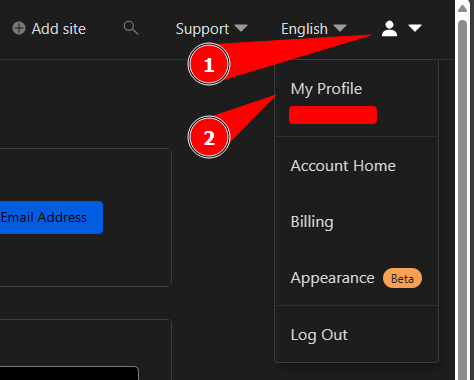
Navigate to your profile to create an API key for the script:
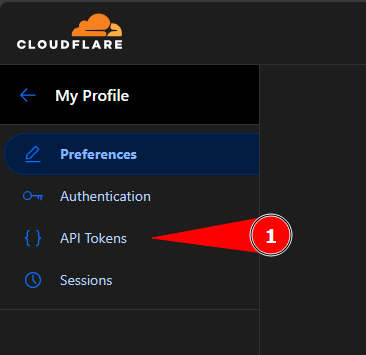
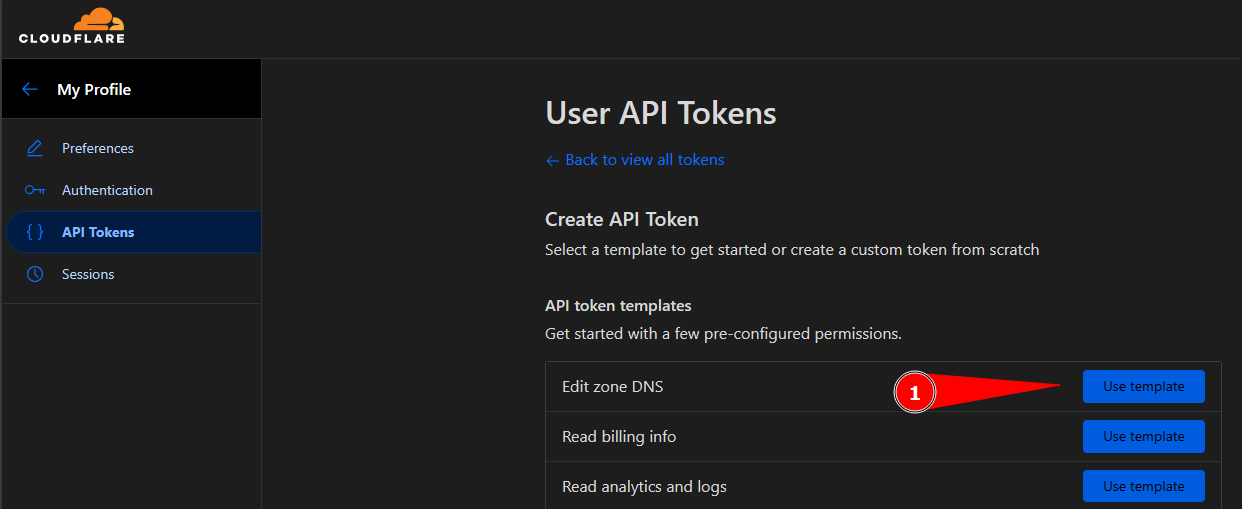
Create a new API token:

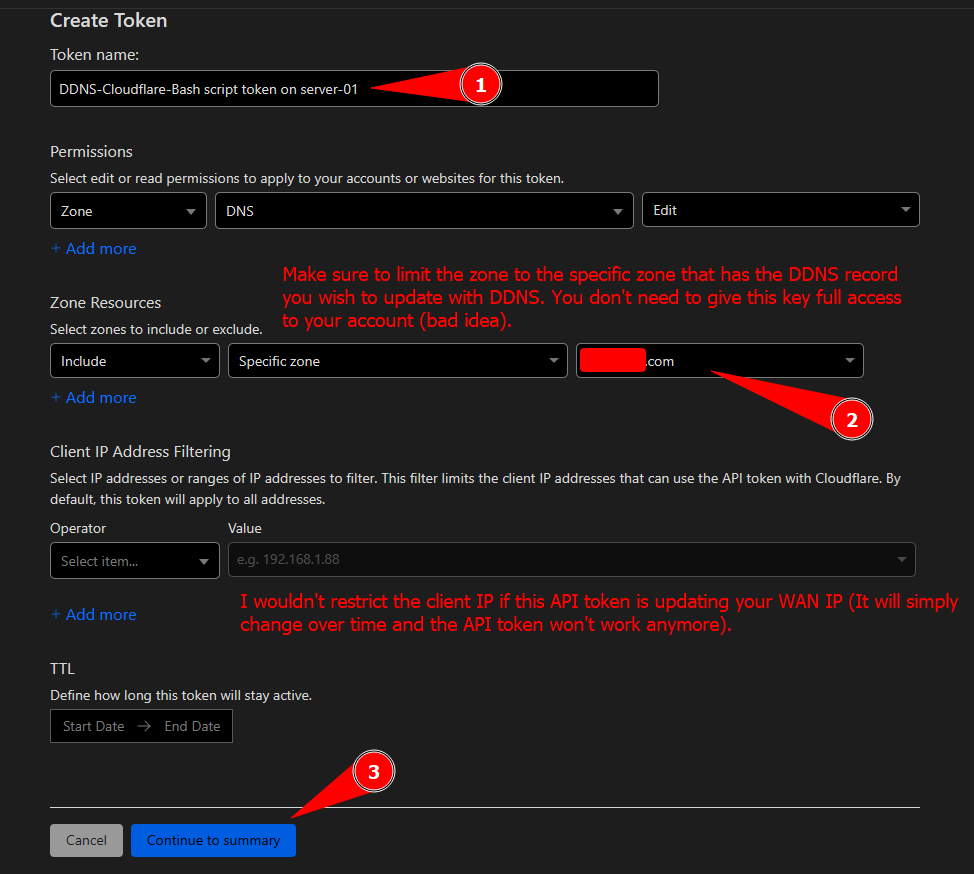
Change the name of the token to something you will recognize in the future in case you need to create more tokens:
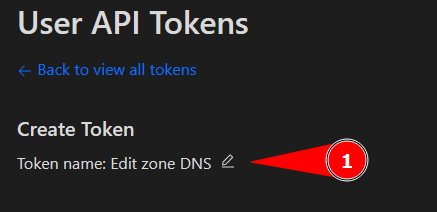 It should look similar to this at the end:
Create the token:
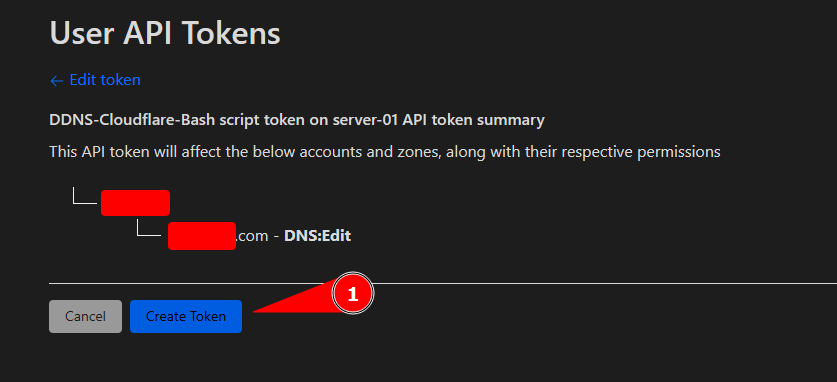 Make sure to copy the API token as you won’t be able to view it again when you go to API tokens in your account:

Modify the variables in the script:
Add a user for the script (non-privileged user):
sudo adduser --disabled-password --gecos "" cloudflare-ddnsSwitch to the new user:
sudo su cloudflare-ddns
Install the script in the non-privileged user directory by pasting the command below into the command line:
mkdir $HOME/cloudflare-ddns/; cd $HOME/cloudflare-ddns/; \
wget https://raw.githubusercontent.com/fire1ce/DDNS-Cloudflare-Bash/main/update-cloudflare-dns.sh; \
wget https://raw.githubusercontent.com/fire1ce/DDNS-Cloudflare-Bash/main/update-cloudflare-dns.conf; \
chown $USER:$USER -R $HOME/cloudflare-ddns; chmod 600 update-cloudflare-dns.conf; \
chmod 700 update-cloudflare-dns.sh
Edit the config file to add your parameters to it:
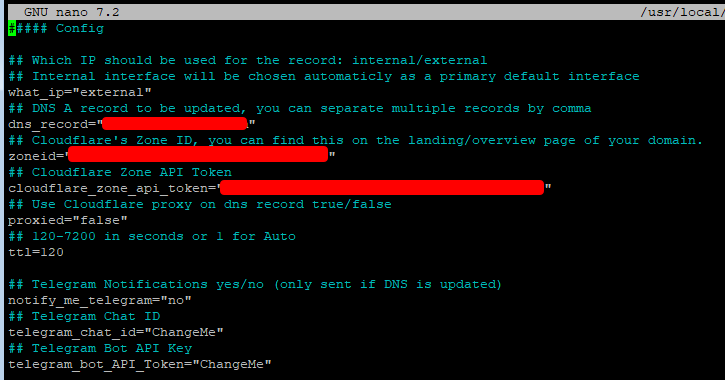
nano $HOME/cloudflare-ddns/update-cloudflare-dns.confModify the variables in the config file:
Important
You only need to modify the following variables:
dns_record: The fully qualified domain name of the record the script should update in your DNS zone (example: test.mydomain.com)zoneid: The Zone ID you copied in the previous section.cloudflare_zone_api_token: The API token you generated in the previous section.proxied: Keep set tofalseif you need this record to be a DNS only record without Cloudflare proxy.ttl: This is the Time To Live (TTL) for your DNS record. The minimum allowed by this script is 120 seconds (2 minutes).
run the script to test it:
./update-cloudflare-dns.sh ./update-cloudflare-dns.confIf you do not get any errors proceed to adding a crontab for this script:
Important
Do not run this command with
sudo. The whole point of creating a new user for the script is so that it runs as an unprivileged user.
crontab -eAdd the following line to the bottom of the user crontab:
* * * * * $HOME/cloudflare-ddns/update-cloudflare-dns.sh update-cloudflare-dns.confSave the crontab and exit from the user account:
exitRelated Notes:
- Link to Home-Page.